Wow, it was not easy to create and launch my first crochet course! Watch this vlog for a behind the scenes look at a day in the life of a creative course creator.
Read MorePart 1: Behind the Scenes - Creating New New Online Crochet Class
I'm launching my first online crochet class! 🥂 And this is my creative mess.
If you’ve ever wondered what it’s like to work from home in a creative field, then you’re going to like this vlog.
Read MoreHow to Crochet Seed Stitch in the Round
I recently had a major surgery with a 6 week recovery. While I was lazing about and letting my body heal, I started browsing Pinterest for some new crochet inspiration.
And I discovered seed stitch! It was a great moment because I felt inspired and motivated for the first time since my surgery. Unfortunately, I was staying with my parents for help while I recovered. And I cursed to realize that I hadn’t brought the right crochet hook with me to try out seed stitch right away.
So, I had to wait until I got back to my own house to try it. And it was worth the wait!
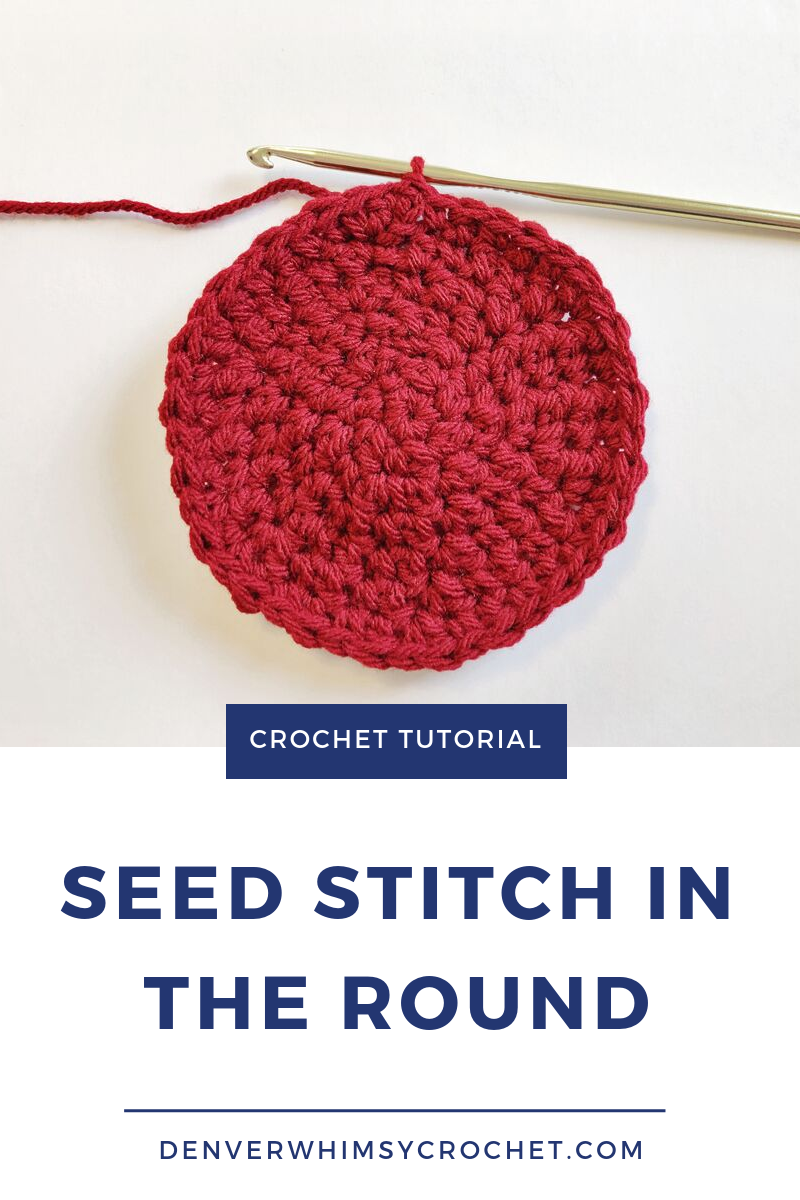
I really love how seed stitch takes two basic crochet stitches (double crochet and single crochet) and combines them in a way that looks totally different than plain double or single crochet.
I’m actually making two video tutorials on seed stitch. One on seed stitch in rows and one on seed stitch in the round.
I definitely find seed stitch in the round to be slightly more challenging. I always have to turn off my TV or audiobook so that I can concentrate and count my stitches!
And I don’t know about you, but I enjoy a new crochet challenge every once in awhile.
So, if you’re in the mood to try something fun and new, then watch the video tutorial below and give it a shot!

Crochet skills you need for seed stitch in the round
Magic Circle
Single Crochet
Increase
Double Crochet
I’m so obsessed with seed stitch that I’m dreaming up all kinds of designs with it! I’ll be releasing at least two new beanie crochet patterns using seed stitch in the round.
If you’d like to be notified when the new patterns launch, then sign up below and join my email list!
WIP Wednesday: Infinity Scarf
You don't need to spend much time in the crafting world before hearing the popular acronym WIP, which stands for Work In Progress. Honestly, I usually have at least three WIPs going on at once! Some of which are over a year old. Ooops.
So, I've decided to participate in the WIP Wednesday blog thread and start sharing them with you on Wednesdays, in hopes that I'll follow through and finally finish them. Because...Friday is FO (Finished Object) Friday. I'm hoping that posting this WIP on Wednesday will help me end up with an FO to post on Friday.
This week's WIP is about 9 months old. Embarrassing, I know, but I'm sharing to help get out of this cycle! I made up a pattern for an infinity scarf and I made a couple last winter. Then, I got a new color of yarn to make a third scarf and decided to write down the pattern as I crocheted and create a new pattern to sell.

Somehow, I got totally derailed on this scarf and pattern writing. I think I'll blame it on the holiday rush of beanies that I had to make at the same time. So, I recently found it my box of WIPs and decided it was time to finish it, write the pattern and make my dreams come true! ;)
The only problem that I had with re-starting this WIP is that I had forgotten the pattern that I was using! The bulky, bumpy nature of this yarn made it hard for me to see the stitches I had been doing to get this far.
Fortunately, I had a notebook of pattern ideas that I'd been writing. I looked back and it was one of the very first ones in the book. So, I was able to figure out what I had been doing that looked so nice and continue crocheting. So far, I think it's looking great!
Unfortunately, I lost the label from this yarn sometime in the last year, so I have no idea what it's called. I'm sure that I got it from Michaels so I can only hope that they still carry it!
The best news about this scarf pattern, is that it actually works up really quickly! So, now that I remembered the pattern, I should be able to finish it in time for FO Friday.
Do you have a WIP that's a year old or more? Do you think you'll ever finish it? Tell me about it in the comments and post a link if you've posted pictures!
How to Crochet a Beanie: Single Crochet
Welcome to Step 2 of crocheting a beanie, the single crochet. In crochet patterns, single crochet is abbreviated as sc.
I love to make beanies with single crochet. The stitches look smooth, tight and beautiful. (Hmmm, that sounds a little dirty, but I'm talking about crochet here! ;) Anyway, single crochet is a basic, easy stitch and it creates awesome results. I use it in most of my patterns so once you nail this stitch, you'll be on your way to making tons of fun projects.
To start your single crochet beanie, you first need to make a magic circle. Now you're ready to do some single crochets into the circle to start the very top of your beanie. See the video below for step-by-step details.
For some people. the magic circle and the first single crochet stitches are the hardest part of the entire beanie. So, take your time and don't get frustrated. Watch the video a few times and follow exactly what I do. Rest assured that your effort is worth it because your beanie is going to look awesome! And, once you've got this part down, the rest of the hat will be easy peasy.
How did it go? Were you able to successfully execute a single crochet stitch? Tell me about it in the comments below! ;)
How to Crochet a Beanie: Magic Circle/Magic Ring
How do you start to crochet a beanie? Never fear, your question is answered here. I'd wager this is the hardest step of the whole process, so be a bit patient with yourself if this seems difficult at first.
Even though this might take some practice to learn, it will be worth it and you'll see why in my video. Using the magic circle makes your beanies look awesome!
In my patterns, I write this step with the abbreviation mc/r. In some patterns, you'll also see MAL, which stands for Magic Adjustable Loop. These two techniques are the same, so this tutorial can help with whichever pattern you're working with.
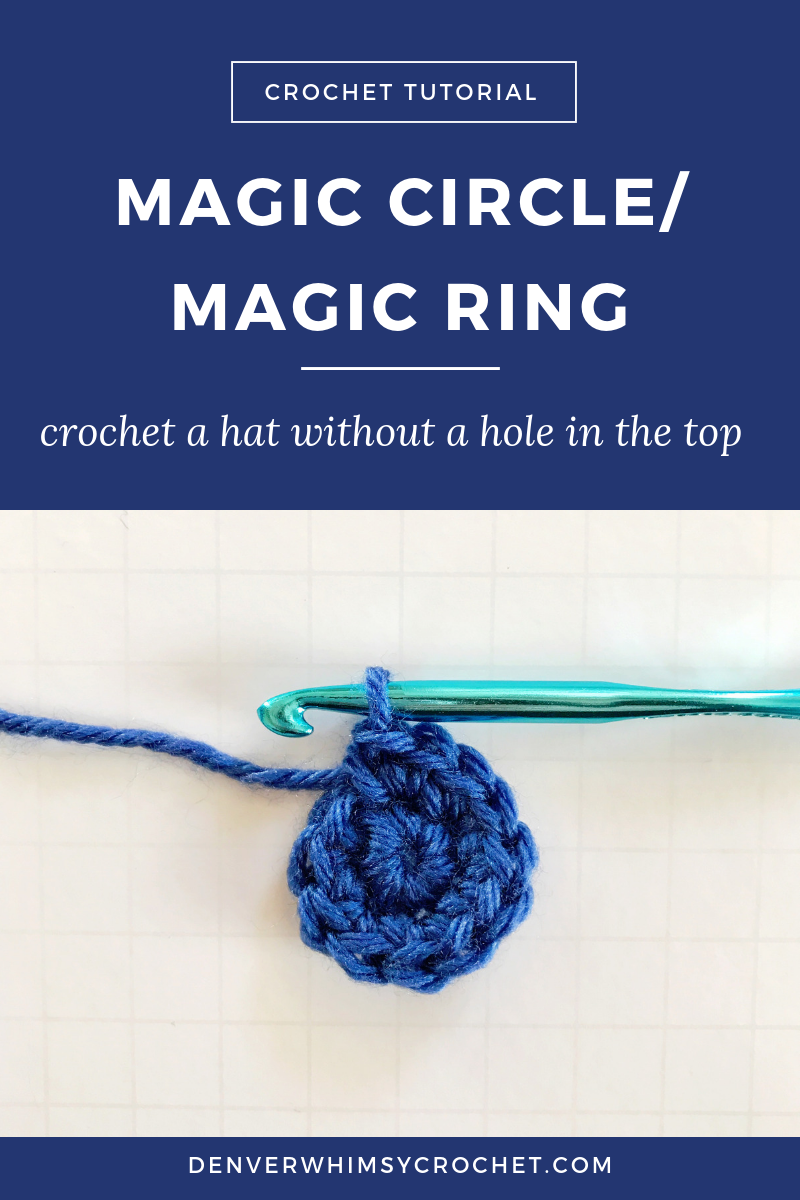
The magic circle/magic ring technique will result in a beanie with no hole at the top! It really is magic. Use this to start all of your beanies for a clean, neat appearance with no odd hole in the top.
The first step to starting your crochet hat
How did it go? Were you able to start your beanie with the magic circle? Let me know in the comments below!
Want to try your hand at using the magic circle to crochet a beanie? Grab my FREE Mens One Hour Beanie Crochet Pattern here.
